


DS-1272ZJ-110B(Black)

 Opis
Opis
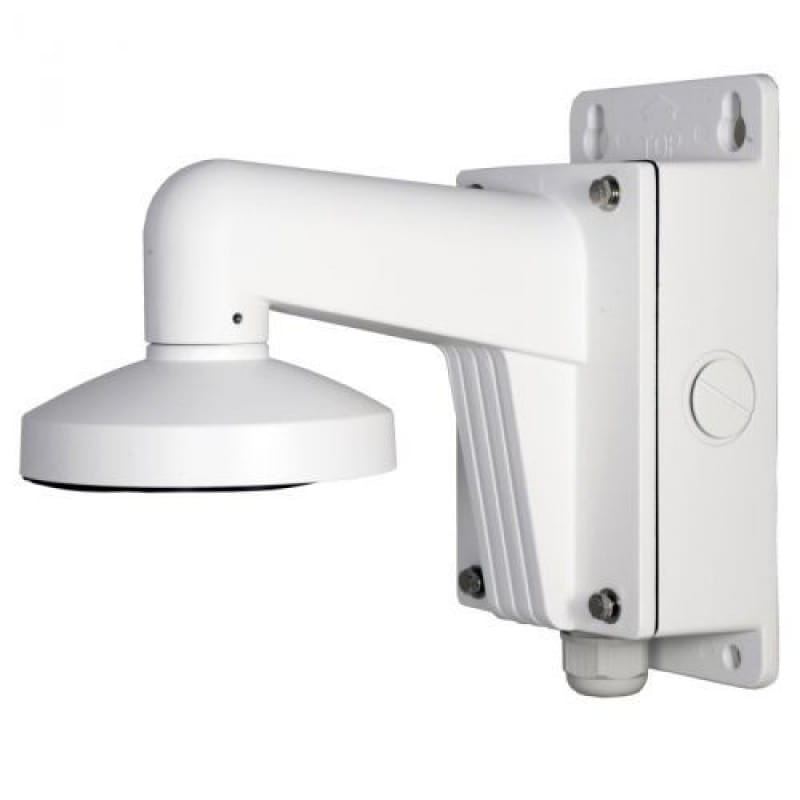
Uchwyt ścienny z puszką przyłączeniową do montażu kamer Hikvision serii DS-2CD21xx, DS-2CD2310(20)-I, DS-2CE56D5T-IT1/IT3, DS-2CE56C2T-IT1/IT3, DS-2CE56C5T-IT1/IT3, DS-2CC51D3S-VPIR. Materiał: aluminium. Wymiary: 123x180x227.8mm. Waga około 1205g. Kolor czarny....
Gwarancja: 36 mies.
Karta katalogowa 
Tekstowa zawartość karty katalogowej PDF:
DS-1272ZJ-110B
Wall Mounting Bracket for
Dome Camera (with Junction Box)
Features:
Aluminum alloy material with surface spray
treatment
Design of cable entrance hole
Better water proof design
Junction box for better cable arrangement
Dimension:
Order Model:
DS-1272ZJ-110B
Parameter:
Model
Parameters
DS-1272ZJ-110B
Wall Mounting Bracket for
Dome Camera (with Junction Box)
Appearance Hik White
Range of
Application
Dome camera wall mounting
Material Aluminum Alloy
Dimension 123x180x227.8mm
Weight 1205g
Notice:
Pay attention to the color matching when select bracket
The bracket should be installed on flat wall
The wall must be capable of supporting over 3 times as
much as the total weight of the camera and the mount.
The maximum load capacity of the bracket is 4.5KG
Model Suitable:
DS-2CC51D3S-VPIR, DS-2CC52D5S-VPIR, DS-2CD2112(D)-(I),
DS-2CD2132(D)-(I)
Installation Step:
① Choose the appropriate
wall to fix the junction
box
② Thread cable through
waterproof stopper
③ Install bracket to junction
box; thread the cable and
screw up
④ Screw adaptor cap to bracket
and fix with fastening screw;
thread the cable
A: Fastening screw
⑤ Take off lower dome and
inner dome module
⑥ Thread the cable and
fix module to adaptor
cap
⑦ Adjust the angle of view;
install lower dome and screw
up
⑧ Installation complete
Note: The actual bracket may vary from the picture above.